Cara Membuat Dua Akun WhatsApp dengan Satu HP Dual-SIM yang Sama

Posted by Unknown Kamis, 31 Oktober 2013 0 komentar
WhatsApp telah menjadi chat messenger paling populer diantara pengguna Android dan berbagai platform mobile lainnya.  Selain ringan, tampilan WhastApp yang simpel dan koneksi yang jarang pending membuat WhatsApp jadi aplikasi idola untuk menghubungkan komunikasi kamu dengan keluarga, kerabat, rekan kerja/kuliah dan kekasih. 
Baru-baru ini ada salah satu followers @DroidUNJ yang bertanya, "Saya pakai hp dual sim. Bagaimana caranya agar kedua nomor yang ada bisa digunakan untuk WhatsApp di satu hp?". Pada umumnya, kita hanya dapat menggunakan satu akun (satu nomor HP) di WhatsApp. Lalu bagaimana dengan HP dual sim? Bisakah memanfaatkan kedua nomor yang ada untuk digunakan dua-duanya di WhatsApp? Tenang. Masalah di dunia ini pasti selalu ada jawabannya, termasuk menggunakan lebih dari satu akun Whatsapp pada HP dual SIM yang kalian miliki. Syaratnya, HP android yang kalian miliki harus dalam keadaan root (silakan googling kalau belum paham tentang rooting).
Langkah-langkah:
  1.  Download dan install SwitchMe di Play Store
  2. Buka SwitchMe dan buatlah dua profile akun untuk dua akunWhatsApp yang berbeda.
  3. Administrator Account akan menjadi akun WhastApp primer-mu (Primary Profile), sementara Secondary User Profile akan jadi akun WhatsApp  lainnya.
  4. Sekarang, barulah install WhatsApp untuk akun yang kedua. Ikuti step simpel ini sebelumnya:
  • Swith ke Secondary Account di SwitchMe
  • Set up nomor HP-mu yang kedua untuk akun ini
  • Buka Play Store dan install WhatsApp
      5. Sekarang, register WhatsApp dengan menggunakan nomor HP yang kedua.
      6. Selesai!
Note: Kedua akun WhatsApp dengan dua nomor yang berbeda tida bisa aktif bersamaan, tapi kamu bisa gunakan secara bergantian dengan satu HP yang sama. Selamat mencoba :)

Baca Selengkapnya ....

Bagaimana Cara Menggunakan Autotext di Android?

Posted by Unknown Selasa, 29 Oktober 2013 0 komentar
Autotext sudah tidak asing lagi bagi anda yang suka chat melalui messenger atau bergaul di social media, sekalipun anda bukan blackberry user. Bagi anda yang menginginkan autotext seperti layaknya pada OS blackberry, android juga menawarkan fitur autotext. Pada artikel ini mari kita berbagi bersama cara menggunakan autotext pada android.

Apakah Autotext?
Fitur AutoText adalah fitur yang memungkinkan pengguna untuk menyimpan setiap jumlah teks dan grafis untuk digunakan kembali dalam dokumen lain. Fitur tersebut kemudian yang akan menjadi pengganti text yang kita ketik dengan grafis atau tulisan lain (logika kerja auto correction).

Bagaimana cara menggunakan autotext android?
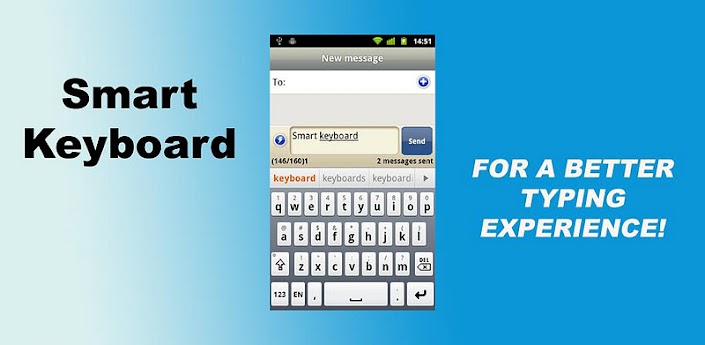
Berikut ini adalah langkah yang harus anda tempuh agar android anda dapat menggunakan autotext seperti layaknya pada blackberry. Ada beberapa aplikasi tersedia untuk autotext pada android
Menggunakan Smart Keyboard
1.Download perlengkapannya :
-Smart Keyboard Pro (4.7.1), extract terlebih dahulu.
-Backup autotext (Autotextnya sudah termasuk dibackup)
-Koleksi autotext atau search pada google (Untuk anda yang ingin menambah koleksi autotext).
2.Instal Smart Keyboard Pro yang telah di download.

3.Kemudian letakkan backupnya dan BB autotextnya di Sd card anda.

4.Masuk menu Pengaturan > pilih Bahasa dan papan tombol

5.Klik centang di Smart keyboard pro.

6.Lalu klik penganturan smart keyboard pro dibawahnya.

7.Klik Backup Setting > restore from sdcard > ok
8.Kemudian masih di menu settingan klik text prediction
- Auto-capitalization: on
- Quick fix: off ( agar tidak otomatis terganti begitu mengetik )
- Show suggestion: on
- Autocomplete: off ( agar tidak mengganggu (otomatis ganti kata) begitu spasi )
- Swap punctuation : off
- Space after picking : off
- Contact Dictionary : on/off (optional, jika ingin suggestion ambil dari nama kontak di hp)
- Always suggest: on ( agar muncul suggestionnya apa begitu mengetikkan sesuatu )
9.Untuk Menambah atau mengedit Autotextnya caranya mudah.
-  masih di nomer 8 cari paling bawah klik Custom Autotext
-  lalu klik add autotext/edit
- kolom 1 kata yang memunculkan autotextnya misalnya haha nanti akan muncul °Âº ° =))Hªªhªªhªªhªª ° °Âº
-  kolom 2 BB autotextnya
- buka file yang agan download tadi : BB Autotext (disitu banyak sekali autotext-autotext yang agan bisa tambahkan )

10.Setelah semua selesai masuk kemenu backup setting lagi untuk membuat backup yang ini. agar settingannya tidak hilang. backup yang tadi akan digantikan dengan backup yang baru.

11.Selesai sekarang tinggal kita menerapkan smart keyboard pro nya nya,pada saat ingin mengetik tahan 3 detik di kolom pengisian text,misalnya di pesan, tahan 3 detik di kotak pengisian pesan nanti ada input metode, dan lalu pilih Smart keyboard pro.
12.Untuk menambah autotext, silakan masuk ke setting Smart Keyboard Pro>Text Prediction setelah itu pilih add text
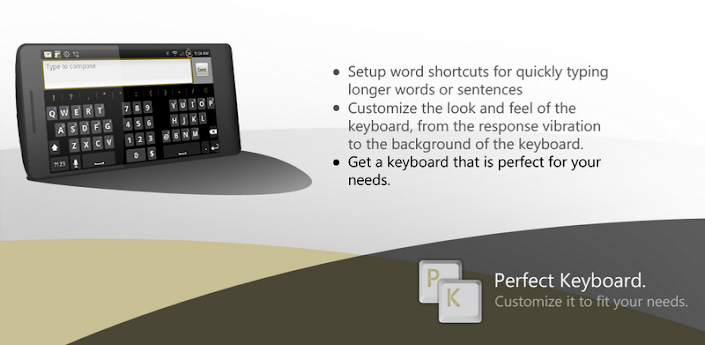
Tambahan:
Menggunakan Perfect Keyboard
Cara yang harus anda lakukan hampir sama dengan menggunakan smart keyboard, namun hanya saja aplikasi yang anda gunakan berbeda. Untuk menggunakan, anda bisa download perfect keyboard pro download di sini 

Menggunakan A.Itype Keyboard
Cara yang harus anda lakukan juga hampir sama dengan menggunakan smart keyboard dan perfect keyboard, namun hanya saja aplikasi yang anda gunakan berbeda dan lebih lengkap fiturnya dibanding kedua keyboard di atas. Untuk menggunakan, anda bisa download A.Itype keyboard plus download di sini atau mirror.

Tips:
Beberapa alternatif cara mendapatkan autotext sebenarnya dapat anda gunakan pada keyboard yang memiliki fitur auto correction dengan logika yang hampir sama yaitu memberikan masukan data pada library untuk menggantikan kata yang anda buat autotext.
Fix masalah font karakter kotak
CARA 1
install menggunakan x-recovery (xperia family), custom recovery (optimus family), cwm/amonRA recovery (HTC+Juned), Samsung recovery (power+volume down begitu hh dinyalain).

download filenya disini
cara install:
1. copy file yg tadi udah di download ke sdcard
2. masuk ke recovery. pilih custom zip
3. choose from sdcard
4. cari file font DroidsanByIhint.zip
5. install and reboot

CARA 2
cara manual (tidak pakai fontchanger, etc)
1. download font disini dan ini
2. extract kemudian masukan disdcard
3. copy and paste font tadi di /system/fonts
4. lihat permision file sebelumnya lalu replace file yang ada 
5. samakan permisionnya dari font bawaan yang udah di lihat tadi (untuk menghindari bootlop)
6. reboot

Sumber: Tips-Droid


Baca Selengkapnya ....

Metro Minimalist -Unique Blogger Template

Posted by Unknown Rabu, 23 Oktober 2013 0 komentar
Metro Minimalist is a unique professional Blogger Template hosted on Btemplates.com. The Template is very popular due to its several gusty features. Beautiful color combinations along with Social media icons widget is embedded into it. The template has 2 columns, Awesome Glowing menu at the top, footer columns, post thumbnails. The template has threaded comments style and breadcrumbs. Moreover, the template looks very unique due to its Simple look.
From its uniqueness point of view i would rather give you the suggestion to use this template as a blogging niche. However, it depends upon you how you think :)

Metro Minimalist

Metro Minimalist unique Blogger template
DEMO          DOWNLOAD

If you are in search of professional and unique Blogger Templates then follow the below link:

Free Professional Blogger Templates


Baca Selengkapnya ....

Little Galaxy: Are you ready for space travel?

Posted by Unknown 0 komentar
Fresh from watching the Gravity 3D movie, it was simply awesome. The vastness of space and the dangers faced by the astronauts were convincingly captured in it. Well this is not a review post of the movie :) it's just that "space" is one of my area of interest. 

And see, this time I have a game to share which is also related to "space". Little Galaxy by developer Bitmap Galaxy is an Android arcade game set in space. In this game you play as a young boy jumping from one planet to another in his journey.


Little Galaxy game is quite light weight but it's 3D graphics are pretty cool and gives a realistic feel of planets, stars etc., but please do not compare it with "Galaxy on Fire 2" which is simply the best but a much heavier game.


Little Galaxy: Launch screen
Game Play
The game play is pretty simple you just need to keep jumping from one planet to another. But mind you, life in space is not that simple and if you remember in Gravity movie Sandra also says "I hate space" at some point. While jumping you need to consider the gravitation force of other nearby planets or else you will be lost in space, also as the planets are rotating on their axis you need to wait for the right time before jumping. About the game controls, just press on the screen whenever you are ready to jump, that's it no other action required.

As you play the game you keep collecting points like if you spin along the planet you collect points, spins are counted also the number of planets you visited are counted. Each game level has some associated objectives, once you achieve the objectives you move to the next level.


Little Galaxy: Level objectives
Game levels have time limit associated with it, while in the game on the top left side of screen you will see darkness covering the moon, once the moon is completely eclipsed your game is over, so do not spend too much time on one planet and quickly move on to another one.


Little Galaxy: Wait for the right position to jump
Game objectives could be like scoring specific number of game points, visit number of planets, watering sun-flowers or taking specific number of spins. It is OK if you do not complete all the level objectives in one go, if you have completed only one out of three objectives, you can play the level again till all the objectives are achieved.


Little Galaxy: Take a spin


Little Galaxy: Keep a safe distance from sun
There are some special items which could be collected like magnets, if you collect three of them, points will get attracted to you or if you collect three stars you gets an extra life.


Little Galaxy: Collect the magnets
One such item is to catch the comet as seen in the below screenshot, if you catch the comet you will get some extra time to complete the level. Big jumps are also awarded with extra points. 
So, go ahead play the game and see how far can you go?


Little Galaxy: Catch the comet for extra time
How much it costs you: 1 US $ approximately.

If you like this post or know any other app / game in the same category, let me know via comments.
To get notification about the new posts on this blog, do not forget to subscribe to this blog through email subscription option from the side bar.

See also:
Other games equally enjoyable by kids:


Baca Selengkapnya ....

How To Add Facebook Likes Lightbox To Blogger

Posted by Unknown Sabtu, 19 Oktober 2013 0 komentar
Facebook Likes Light Box: Facebook being the NO.1 ranked site in the world is making things very simple for peoples day by day. They are mixing up things in Facebook from A__Z. This time Facebook developers have launch an aweome Facebook likes Lightbox which has really best features than its previous like boxes, Such as Facebook Static like box and Floating Facebook like box.
By embedding this widget on your blog you will be able to see a widget while your blog loads, the widget tends to be there for 10 secs, and then it just dissapears without boring your visitors or forcing them to likes.
Faceboook likes lightbox

How To Add Facebook Likes Lightbox To Blogger

  • Visit Blogger Dashboard.
  • Now click on your site.
  • Then click on layout tab there.
  • Now click on the Add a gadget Link there.
  • A box will pop up, Now copy the below code and paste it inside that box.
<script src='http://ajax.googleapis.com/ajax/libs/jquery/1.7.2/jquery.min.js' type='text/javascript'></script>
<style>
#fanback {
display:none;
background:rgba(0,0,0,0.8);
width:100%;
height:100%;
position:fixed;
top:0;
left:0;
z-index:99999;
}
#fan-exit {
width:100%;
height:100%;
}
#fanbox {
background:white;
width:420px;
height:270px;
position:absolute;
top:58%;
left:63%;
margin:-220px 0 0 -375px;
-webkit-box-shadow: inset 0 0 50px 0 #939393;
-moz-box-shadow: inset 0 0 50px 0 #939393;
box-shadow: inset 0 0 50px 0 #939393;
-webkit-border-radius: 5px;
-moz-border-radius: 5px;
border-radius: 5px;
margin: -220px 0 0 -375px;
}
#fanclose {
float:right;
cursor:pointer;
background:url(https://blogger.googleusercontent.com/img/b/R29vZ2xl/AVvXsEhghQitCIh5PSGzzvESbWka5-hLcWx-jyeXUy9vzM2sy73aMhaTLqIAC5vK-iM4_vFQLa3l9oLAqOD6bqqcqmBy6brx9v2HGwgY8j9Qj1ahnpNMWR22cOXYioiG5LVuccBcmReZeWJU0keE/s1600/fanclose.png) repeat;
height:15px;
padding:20px;
position:relative;
padding-right:40px;
margin-top:-20px;
margin-right:-22px;
}
.remove-borda {
height:1px;
width:366px;
margin:0 auto;
background:#F3F3F3;
margin-top:16px;
position:relative;
margin-left:20px;
}
</style>


<script type='text/javascript'>
//<![CDATA[
jQuery.cookie = function (key, value, options) {

// key and at least value given, set cookie...
if (arguments.length > 1 && String(value) !== "[object Object]") {
options = jQuery.extend({}, options);

if (value === null || value === undefined) {
options.expires = -1;
}

if (typeof options.expires === 'number') {
var days = options.expires, t = options.expires = new Date();
t.setDate(t.getDate() + days);
}

value = String(value);

return (document.cookie = [
encodeURIComponent(key), '=',
options.raw ? value : encodeURIComponent(value),
options.expires ? '; expires=' + options.expires.toUTCString() : '', // use expires attribute, max-age is not supported by IE
options.path ? '; path=' + options.path : '',
options.domain ? '; domain=' + options.domain : '',
options.secure ? '; secure' : ''
].join(''));
}

// key and possibly options given, get cookie...
options = value || {};
var result, decode = options.raw ? function (s) { return s; } : decodeURIComponent;
return (result = new RegExp('(?:^|; )' + encodeURIComponent(key) + '=([^;]*)').exec(document.cookie)) ? decode(result[1]) : null;
};
//]]>
</script>
<script type='text/javascript'>
jQuery(document).ready(function($){
if($.cookie('popup_user_login') != 'yes'){
$('#fanback').delay(100).fadeIn('medium');
$('#fanclose, #fan-exit').click(function(){
$('#fanback').stop().fadeOut('medium');
});
}
$.cookie('popup_user_login', 'yes', { path: '/', expires: 7 });
});
</script>

<div id='fanback'><div id='fan-exit'></div><div id='fanbox'><div id='fanclose'></div><div class='remove-borda'></div>
<iframe allowtransparency='true' frameborder='0' scrolling='no' src='//www.facebook.com/plugins/likebox.php?

href=https://www.facebook.com/pages/Trickspunch/1397531987130417?ref=hl&width=402&height=255&colorscheme=light&show_faces=true&border_color=%23E2E2E2&stream=false&header=false'

style='border: none; overflow: hidden; margin-top: -19px; width: 402px; height: 230px;'></iframe>
</div></div>
  •  Now change the Text in red to your Facebook page Address.
  • Thats it, Save that gadget.
  • See the change with Facebook likes Lightbox.
If you have any problems while implementing this tutorial, ask us through the comment box we well help you! What are you waiting for just add it and enjoy getting more likes

Baca Selengkapnya ....

Prince of Persia Shadow & Flame: Return of the classic prince

Posted by Unknown Rabu, 16 Oktober 2013 0 komentar
There are few computer games which are very close to everyone's heart and it is not possible to let it go. I am pretty much sure that anyone who has played PC games ever has tried his hands playing "Prince of Persia" or at-least heard about it. It is one of the early DOS based games through which we learnt to fight with the enemies and came to know that computers can also be so much of fun.

Ubisoft (one of my favourite game developer) has launched one of the classic Price of Persia title Shadow & Flame with new age stunning 3D graphics and touch screen friendly controls. Through this post, I will walk you through this fantastic game which I have installed on my Nexus 7. I am sure you are going to enjoy it.


Pop Shadow & Flame: Launch Screen
Pop Shadow & Flame in total consists of four worlds as: Palace, Skull Caves, Ruined City and Red Temple that comprises of 14 levels and trust me once you finish this game you will ask for more. You as the Price of Persia starts your adventurous and dangerous journey to save your princess from the captivity of evil Jaffar from the 'Palace' world, traverse to the other worlds and in the end come back to the same world for the final showdown.

Game Play
The game play and controls are quite easy to understand, on the left side of screen slide left and right to move forward and backward, on right side of screen slide up for jump and down for crouch. As you move forward in this game you learn few new techniques of fighting and jumping.

Within the game, you collect coins, health potions and revives. Using the coins you can further buy powerful swords, tricks and also potions. These potions can help you to gain full strength or bring you back to life in case of death.

Pop Shadow & Flame: On the way to Skull caves
In this game you fight with different kinds of enemies like guards or skeletons and skulls. You also learn to use some hit combo to hit them hard and save your health and time, as there are objectives associated with each level and time is one of them.


Pop Shadow & Flame: The level objectives
Pop Shadow & Flame: The level objectives
As you complete a level you are presented with options like continue to next level or replay the same level. If you want to play any of the previously played levels you can choose it from the world map accessible from home screen.


Pop Shadow & Flame: In red temple
I would specially like to mention about the graphics and the locations shown in this game, it looks simply great and have a mystic feeling in it and on high resolution screen it's a treat to watch and play.


Pop Shadow & Flame: Fighting with skeletons

Pop Shadow & Flame: Beware of the falling daggers

Pop Shadow & Flame: Fighting with deadly skulls
The 13th level called 'The Dream' is a tricky level to complete as you are unsure how to move forward because the path keeps changing as you put a step ahead and also the location shown is also quite freaky. Another strange thing is, this level cannot be selected from world map but only be accessed by playing and completing level 12.

Pop Shadow & Flame: The Dream level
In the last level, killing Jaffar is quite a daunting task as he is a deadly magician, but the prince has to do it. Once Jaffar is finished, prince frees the princess and see it yourself what happens after that.

Pop Shadow & Flame: Princess and prince lived happily ever-after
Pop Shadow & Flame: Princess and prince lives happily ever-after
There is something I would like to mention here, when I was checking the credits of this game, I was in for a nice surprise, this game is developed at Ubisoft's Pune studio, the same city I belong to :).

How much it costs you: 3.5 US $

If you like this post or know any other app / game in the same category, let me know via comments section.
To get notification about the new posts on this blog, do not forget to subscribe to this blog through email subscription option from the side bar.

See also:
Other similarly enjoyable games:

1. Manuganu: Fantastic running game with difference
2. Major Mayhem: Running action game, great action, unlimited fun

Baca Selengkapnya ....

Mybloggertricks professional menu bar for Blogger

Posted by Unknown Selasa, 15 Oktober 2013 0 komentar
MBT Professional Menu Bar: We have recently teach you How to add Glowing Horizontal Menu bar to Blogger, and simple black Horizontal Menu bar to blogger. But today we come over here with totally unique and professional stuff. Yeah, We are going to teach you How to add MBT Professional Menu bar to Blogger. We all know that MBT is a very professional website and peoples are very inspired of it!
So looking at the trend, I have think of creating this Menu bar. So let me teach you how to do this Tutorial.
MBT Professional menu bar

 How To Add MBT Professional Menu Bar To Blogger

  • First of all Go To Blogger Dashboard.
  • Now click on the Template>> Edit HTML tab as shown below.
Edit HTML
  • Proceed in the Template coding and search for the ]]></b:skin> tag.
  • Now copy the below code and paste it below ]]></b:skin> tag. 
#Main-Menu {
float:right;
width : 1018px;
height : 70px;
margin : 0 auto;
padding : 0px 0px 0px 0px;
}
#Main-nav {
margin : 0px 0px 10px 15px;
padding : 10px;
}
#Main-nav ul {
float: left;
list-style: none;
margin: 10px auto;
padding: 0;
}
#Main-nav li {
list-style: none;
margin: 17px -10px 0px 0px;
padding: 0;
background:url(https://blogger.googleusercontent.com/img/b/R29vZ2xl/AVvXsEjQbmX3tysnJhpYpnk-fJ75QgpuBpffgCyF7PHuI-hHGCIG0MUJSWxaJrzB9_S2rikuhd-ptfxSRinhQO487k0jYRwahAj_Bnypy0IBKyK9trC7Mq5jsRwZ5e07nl5VIeVgBUggVBfKdMQ4/s320/menu-bg.png) no-repeat;
background-position: 0px 0px;
width:169px;
height:42px;
float:left;
}
#Main-nav li:hover {
background-position: 0px -52px;
}
#Main-nav li.highlight {
background: url(https://blogger.googleusercontent.com/img/b/R29vZ2xl/AVvXsEh4EQHEcBnvAyLyrtjbDRg9Gt3L07VtDBAxP95NHxgRawoLsiXmKHA2H2kH4UhRwcunTJjlflX-vz9fQ8QKHlpNUZM5v4se9eBOFg9UdGF4XOu_QT3ogUhL740yX2yG633o_qFZqOu7_1os/s400/menu_button_white.png) 0px 0px no-repeat;
}
#Main-nav li.highlight a {
color: rgb(51, 51, 51) !important;
text-shadow: 1px 2px 1px #9E9E9E !important;
font-size: 12px !important;
font-family: arial;
font-weight: bold;
text-transform: none;
}
#Main-nav li a{
color: #FFF;
display: block;
font-size: 12px;
font-family:arial;
font-weight: bold;
text-transform: none;
margin: 0;
padding: 15px 0px 9px 60px;
text-decoration: none;
text-shadow:1px 1px 3px #333;
letter-spacing:0.09em;
}
#Main-nav li a:hover {
color: #333;
text-shadow:1px 2px 1px #9E9E9E;
}
  • Now save your template!
  • If you do the above steps, then click on layout.
  • Click on Add a gadget link. 
  • Now select HTML JavaScript gadget from the gadget list as shown below.
HTML

  • A box will appear, now copy the below code and paste it inside the HTML JavaScript gadget.
<div id="Main-Menu">
<ul id="Main-nav">
<li><a href="#"> Home</a></li>
<li><a href="#"> Make Money</a></li>
<li><a href="#"> SEO</a></li>
<li><a href="#"> Web Hosting</a></li>
<li><a href="#"> Blogging</a></li>
<li><a href="#"> Widgets</a></li>
</ul>
</div>

Customization Before Saving

  • Now Replace the # with the URL,s you want peoples to recirect.
  • Also change the Text in green to your desired text you want to show on the menu bar.
  • Now hit the Save button.
  • you are done say Bingo.
 If you face any problems while adding this widget to your blog ask us we are here to solve your problems!

Baca Selengkapnya ....

Divinity Blogger Template

Posted by Unknown Senin, 14 Oktober 2013 0 komentar
Divinity Blogger Template: SEO Blogger Template has launch an awesome template recently they name it divinity blogger Template. The template is very simple cleanly coded, neutral colors combinations along with many customized widgets. According to its author this template is most suitable for Tech related niche, News, Blogging Niche. This template is SEO ready and ads ready giving you the more unique features!

 Divinity Blogger Template

Key Features of Divinity Blogger Template

  • Beautiful ad unit place along side header.
  • Simple and clean professional look.
  • SEO ready template.
  • Top navigation menu bar
  • Social sharing Buttons
  • Numbered page navigation.
  • Customized popular posts widget!
  • Threaded comments style
  • Work with all kind of browsers
  • Beautiful Title logo.

Baca Selengkapnya ....

How To Add Floating Facebook Like Box To Blogger

Posted by Unknown 0 komentar
Floating Facebook Like Box for Blogger: As by the saying " Sharing is caring" every one needs to share their posts on the social media sites. Sharing your posts to social media not only increases your Blog readers or fans But also it put a good impression on search engines when a specific post you share on those social media sites is liked by peoples. However Facebook and Bloggers have made it simple for you to share your post to those social media sites, one is Social media icons through which you can easily share your posts and the other source of getting Fans is the Facebook Like box For your Blog. But that like box was static.
Today we are here with totally different stuff, we are going to post Floating Facebook Like Box for Blogger. Actually by adding this widget, a Facebook like box from the right corner will pop out, which looks very cool. This effect is designed using jQuery. So lets do it!

Floating Facebook Like box

floating-facebook-like-box

How To Add Floating Facebook Like Box To Blogger

Adding This widget is very simple just follow the below easy steps with images to embed this Tutorial on your personal Blog.
  • First of all Go to Blogger Dashboard.
  • Then click on your Blog.
  • Now click on the Template tab as shown below.
Template 
  • Now click on the Edit HTML tab as shown Below.
Edit-html
  • Proceed in the HTML coding.
  • Now search for the </head> tag in the template coding ( by pressing CTRL+F you can find).
  • Now copy the below jQuery script and paste it above the </head> tag.
<script src="https://ajax.googleapis.com/ajax/libs/jquery/1.6.1/jquery.min.js" type="text/javascript"></script>
  • Now save your template!
  • If you do the above steps, then go to Layout tab .
  • Click on the Add a Gadget link as shown below.
layout
  •  A list of gadget will appears, select the HTML/Javascript gadget from that list as shown below.
add-a-gadget 
  • A box will appears, Now copy the Below script and paste it in that HTML JavaScript box.
<a href="http://trickspunch.blogspot.com" target="_blank" title="Blogger Widgets"><img src="http://safir85.ucoz.com/24work-blogspot/cursor-24work-10.png" border="0" alt="Blogger Widgets" style="position:absolute; top: 0px; right: 0px;" /></a><script type="text/javascript">
//<!--
$(document).ready(function() {$(".w2bslikebox").hover(function() {$(this).stop().animate({right: "0"}, "medium");}, function() {$(this).stop().animate({right: "-250"}, "medium");}, 500);});
//-->
</script>
<style type="text/css">
.w2bslikebox{background: url("https://blogger.googleusercontent.com/img/b/R29vZ2xl/AVvXsEgRjnKvSa0qwdYfIZVod-cL5HP_72lQ-72bcPZ51eYHEVNqihDC4LZyBRwXbnpmgH094iZfEmZEXGhvoElVqas3hqszlA4adcVlJKlt9eWCSUQkESn9lto-RDFtSGm7mF1OWL3pAA3wGca2/s1600/facebookbadge.png") no-repeat scroll left center transparent !important;display: block;float: right;height: 270px;padding: 0 5px 0 46px;width: 245px;z-index: 99999;position:fixed;right:-250px;top:20%;}
.w2bslikebox div{border:none;position:relative;display:block;}
.w2bslikebox span{bottom: 12px;font: 8px "lucida grande",tahoma,verdana,arial,sans-serif;position: absolute;right: 6px;text-align: right;z-index: 99999;}
.w2bslikebox span a{color: #808080;text-decoration:none;}
.w2bslikebox span a:hover{text-decoration:underline;}
</style><div class="w2bslikebox" style=""><div><iframe src="http://www.facebook.com/plugins/likebox.php?href=https://www.facebook.com/pages/Trickspunch/1397531987130417?ref=hl&amp;width=245&amp;colorscheme=light&amp;show_faces
=true&amp;connections=9&amp;stream=false&amp;header=false&amp;height=270" scrolling="no" frameborder="0" scrolling="no" style="border: medium none; overflow: hidden; height: 270px; width: 245px;background:#fff;"></iframe><span> / <a href="http://trickspunch.blogspot.com/2013/10/facebook-like-box.html">Get This Widget! </a></span></div></div>
</div>

Customization Before Saving

- All you have to do is, change the text in red to the Facebook page address of your page.
- Now that's it! Click on the save Button.
- If you have any problem while adding this widget to your Blog simply share your problem with us through the comment box, it will not spoil up! We are always here to solve your problems!

Baca Selengkapnya ....

How to Add Subscription widget below every blog post

Posted by Unknown Minggu, 13 Oktober 2013 0 komentar
Subscription Box Below every blog post: We have recently teach you how to add Multi color subscription widget to blogger, and a lot of our visitors take benefit of it. But today we comes off with totally different stuff! Cool subscription widget below ever blog post, yeah. By adding this widget your blog readers will be able to see subscription widget below every blog post, and they can subscribe you through that widget, it should be noted that the widget today I am going to share is completely different from other widgets.
subscription-box

How to add subscription widget below every blog post

  • First go to blogger dashboard.
  • Click on the template tab.
  • Click on the edit html tab there.
  • Now search for the ]]></b:skin> tag.
  • Now copy the below code and paste it above the ]]></b:skin> tag. 
#subscriptionwrap {
    float: left;
    width: 600px;
    background: #e9e9e9;
    padding: 15px;
    border: 1px solid #ddd;
   -webkit-border-radius:4px;     -moz-border-radius:4px;     border-radius:4px;
    -webkit-box-shadow:0 1px 0 #f9f9f9 inset,1px 1px 1px rgba(223,223,223,0.4);     -moz-box-shadow:0 1px 0 #f9f9f9 inset,1px 1px 1px rgba(223,223,223,0.4);     box-shadow:0 1px 0 #f9f9f9 inset,1px 1px 1px rgba(223,223,223,0.4);
 
}

.subscriptionbox h4 {
    font-size: 38px;
    font-family: 'Verdana', Arial;
   font-variant: small-caps;
    margin: 0 auto;
    text-align: center;
    line-height: 30px;
    color: #333;
    font-weight: 600;
    text-shadow:1px 1px 5px #333;
text-decoration: none !important;
}

.subscriptionbox p {
    font-family: geogia;
    font-style: italic;
    font-size: 26px;
    text-align: center;
    margin: 0px;
    line-height: 30px;
    margin-top: 25px;
    border-bottom: 1px solid #333;
    color: #454545;
    padding-bottom: 20px;
}

.emailbutton1 {    background:#f7f8f9;     background:-webkit-linear-gradient(top,#f7f8f9 0%,#e9e9e9 100%);     background:-moz-linear-gradient(top,#f7f8f9 0%,#e9e9e9 100%);     background:-o-linear-gradient(top,#f7f8f9 0%,#e9e9e9 100%);     background:-ms-linear-gradient(top,#f7f8f9 0%,#e9e9e9 100%);     background:linear-gradient(top,#f7f8f9 0%,#e9e9e9 100%);     filter:progid:DXImageTransform.Microsoft.gradient( startColorstr="#f7f8f9",endColorstr="#e9e9e9",GradientType=0 );     border:1px solid #ddd;     -webkit-border-radius:4px;     -moz-border-radius:4px;     border-radius:4px;          margin:0 auto; margin-left: -10px;    -webkit-box-shadow:0 1px 0 #f9f9f9 inset,1px 1px 1px rgba(223,223,223,0.4);     -moz-box-shadow:0 1px 0 #f9f9f9 inset,1px 1px 1px rgba(223,223,223,0.4);     box-shadow:0 1px 0 #f9f9f9 inset,1px 1px 1px rgba(223,223,223,0.4);     color:#888 !important;     text-shadow:0 1px 0 #fff;     line-height:1.1; top: -1px;     cursor:pointer; padding:22px 15px 19px 15px !important;     font-size:14px;     font-weight:bold;     text-decoration:none !important;}
.emailbutton1:hover, .formbutton:hover{    background:#f1f1f1;     background:-webkit-linear-gradient(top,#f1f1f1 0%,#e0e0e0 100%);     background:-moz-linear-gradient(top,#f1f1f1 0%,#e0e0e0 100%);     background:-o-linear-gradient(top,#f1f1f1 0%,#e0e0e0 100%);     background:-ms-linear-gradient(top,#f1f1f1 0%,#e0e0e0 100%);     background:linear-gradient(top,#f1f1f1 0%,#e0e0e0 100%);     filter:progid:DXImageTransform.Microsoft.gradient( startColorstr="#f1f1f1",endColorstr="#e0e0e0",GradientType=0 );     text-decoration:none !important;}
.emailinput1{    height:40px;     margin:10px 0 0 0px;     padding:8px 40px 8px 10px;     border: 1px solid #d2d2d2;     background:#fff;     font-family:georgia;     font-style:italic;     font-size:16px;     color:#949494; -webkit-border-radius:4px;     -moz-border-radius:4px;     border-radius:4px;}
.emailinput1{    padding-right:30px !important;     width:450px !important;}
  • If you do the above steps, then search for the  tag or  If you  find any of the tag, then copy the below script and paste it below the above any tag you find.
<div id='subscriptionwrap'>
<div class='subscriptionbox'>
<h4>Ready To Be Make <strong>Elegant Blog</strong></h4>
<p>Subscribe to Trikcspunch to enjoy Free Tricks</p><center>
<form action='http://feedburner.google.com/fb/a/mailverify' class='emailform' method='post' onsubmit='window.open(&quot;http://feedburner.google.com/fb/a/mailverify?uri=trickspunch&quot;, &quot;popupwindow&quot;, &quot;scrollbars=yes,width=550,height=520&quot;);return true' target='popupwindow'>
<input name='uri' type='hidden' value='trickspunch'/>
<input name='loc' type='hidden' value='en_US'/>
<input class='emailinput1' name='email' onblur='if (this.value == &quot;&quot;) {this.value = &quot;Enter your email...&quot;;}' onfocus='if (this.value == &quot;Enter your email...&quot;) {this.value = &quot;&quot;}' type='text' value='Enter your email...'/>
<input class='emailbutton1' title='' type='submit' value='SignUp'/> <a target="_blank" href="www.trickspunch.blogspot.com"> Widget by Trickspunch </a></form>
</center>
</div>
</div>

Customization

  • Now change the text in red to your desired text you want to display.
  • Change the text in Green to your feeds URL.
  • Thats it1
  • Save your template
  • If you have problems while adding this cool widget simply ask us we are here to help you up!

Baca Selengkapnya ....
Trik SEO Terbaru support Online Shop Baju Wanita - Original design by Bamz | Copyright of android nexus 7.